
Reckless Rush
By RecklessRush · PlaystyleBack to guides
So you want to learn the hidden arts of Reckless Rush (RR)? Well who better to teach you then Reckless Rush himself. In this guide you will learn how to play a super aggressive playstyle which can be applied to all rush deck archetypes as well as how to play RR at a very effective level.
For those not familiar with the RR deck, it is a hyper-aggressive Swarm rush deck that focuses on closing out games as fast as possible to prevent card level differences between you and your opponent from influencing the game heavily. In other words, if you’re looking for a deck that can get you to high ranks with relatively low levels, this is the perfect deck for you.
The Decks
- Green Prototypes
1
 2
2 - Summon Militia
1
 2
2 - Doppelbocks
2
 2
2 - Gifted Recruits
2
 2
2 - Head Start
2
 2
2 - Restless Goats
2
 2
2 - Wild Saberpaws
2
 2
2 - Forgotten Souls
3
 2
2 - Personal Servers
3
 2
2 - Potion of Growth
3
 2
2 - Shady Ghoul
3
 2
2 - Devastators
4
 2
2
This is the current Standard Reckless Rush deck (updated frequently to fit meta conditions).
This deck is suitable for all ranks. It is the most fast paced variation and you should be zooming through the cards in your deck, making it extremely difficult for the enemies to defend against your attack.
If you play in Silver or in lower leagues, I would recommend a small variation of the deck with Snowmasons instead of Summon Militia—which are pretty fantastic at lower levels.
For Diamond and above, if you feel like the enemies are consistently playing cards that completely shut down your Devastators, a great variation is the Flameless Rush variation where Flameless Lizards replaces Devastators. Flameless Lizards provides great stats for it’s mana cost and can often hold the front-line simply on its own.
The most effective way to play this deck is by setting down Flameless Lizards as close to the enemy base as possible and preferably as fast as possible. If this card is set down on mana 5, it is extremely difficult for the enemy to clear it and then Forgotten Souls can help push it into the enemy base on the following turn. There are other fun ways to play the deck such as including Spare Dragonling over Potion of Growth.
- Green Prototypes
1
 5
5 - Summon Militia
1
 5
5 - Doppelbocks
2
 5
5 - Gifted Recruits
2
 5
5 - Head Start
2
 5
5 - Restless Goats
2
 5
5 - Wild Saberpaws
2
 5
5 - First Mutineer
3
 5
5 - Forgotten Souls
3
 5
5 - Potion of Growth
3
 5
5 - Shady Ghoul
3
 5
5 - Flameless Lizards
5
 5
5
- Green Prototypes
1
 5
5 - Doppelbocks
2
 5
5 - Gifted Recruits
2
 5
5 - Head Start
2
 5
5 - Restless Goats
2
 5
5 - Wild Saberpaws
2
 5
5 - Forgotten Souls
3
 5
5 - Personal Servers
3
 5
5 - Potion of Growth
3
 5
5 - Shady Ghoul
3
 5
5 - Temple of the Heart
3
 5
5 - Devastators
4
 5
5
This last deck is a special case deck that should only be used if you find yourself constantly fighting opponents that have 4 or more base health than you. However, do note that this deck is extremely difficult to play and requires advanced knowledge in RR to play at a competitive level.
This deck is centered around the fact that there is no base health cap in Diamond so you can utilize your lower base health to an advantage. This deck is amazing for trimming down high base health titans and generally pushes for slower games than the usual RR which inherently requires more skill to play.
As you might have noticed by now, Reckless Rush decks consist of an extremely low mana curve, with the most expensive card peaking at a cost of 4 mana.
Now some of you are probably wondering, “why should I even play this?” Apart from it being one of the highest win rate decks to ever exist, RR is great for players who are looking for quick games (possibly to grind gold or finish quests) or looking to climb high ranks with relatively low level cards.
Additionally, I’d like to quickly point out that this deck is amazing for grinding quick gold on ladder since games are short and it also makes for a very well rounded deck in most Brawls allowing you to achieve the ![]() 10 fusion stones milestone. Now that you’re all caught up on the introduction, let’s dive into the specifics of this guide.
10 fusion stones milestone. Now that you’re all caught up on the introduction, let’s dive into the specifics of this guide.
How to play
Before jumping into this concept I like to call “prioritisation”, the very first thing I’d like you to do is take a good look at the deck. Take some time to understand it, analyse it (find which cards mix together well) and most importantly memorise it!
I cannot stress this part enough because if you are going into a match without knowing all the cards in your deck, you’re essentially trying to cook a recipe without knowing its ingredients. To play any Stormbound deck at a competitive level, the first step is to analyse the deck.
So let’s get right into a brief overview of all its cards.
Green Prototypes
Green Prototypes are amazing, especially for 1 mana. It is the only 1 mana unit card with movement that currently exists in the game. It is great for setting up combos (since it’s so cheap), moving frontline up so you can deploy more units closer to the enemy base, great for trading into enemy units in last resort defenses, and overall it is just an extra unit on the board the enemy has to deal with.
This card is mostly used for baiting the enemy to attack it, defend a stronger unit that is tucked in the corner, or just to move frontline up/keep frontline. It is perfect for Trinity Openers which will be discussed later on in the guide.
Summon Militia
Summon Militia is not the greatest card in the deck so you should not be actively looking to play it. In fact, it is typically cycled quite often as its main purpose is to use up any excess 1 mana you have and speed up your deck cycle. Remember, the more cards you play, the faster you will draw back cards you played previously.
Look to only play it on turns where you will have 1 mana in excess. In regards to the actual value of the card, it’s only expected to be used to hold your frontline, otherwise it’s not a really great card.
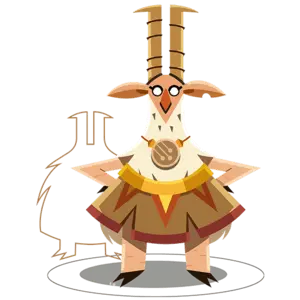
Doppelbocks
Doppelbocks is an amazing 2 mana card—so unique and can serve so many purposes. Since the token unit spawns forward, it behaves similarly to a movement card since it can be used to push the frontline forward. Additionally, since it provides 2 units, it is amazing for keeping frontline because your opponent will likely have to spend extra mana to deal with two units rather than one. Finally, this card can push the frontline forward in cases no other movement cards can. It is perfect for protecting your stronger units.
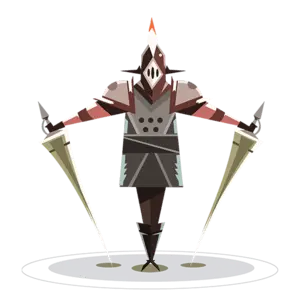
Gifted Recruits
Gifted Recruits is a staple 2 mana unit card in almost every deck and a Swarm rush essential. This card does it all, it pushes frontline forward; it’s a relatively strong unit as well (and only gets better as it levels up); it’s cheap and as a last resort can be used to defend.
The card is typically used as a high strength unit for dishing out damage on the opponent, you will likely want to play it in corners and defend it using other weaker cards like Doppelbocks. On turn mana 5 and if you have a strong board, you can typically afford to play Gifted Recruits + Potion of Growth to put pressure on your opponent and force out cards.
Headstart
The main reason to include Head Start is because the typical Swarm rush deck gets countered by many control cards, specifically cards that deal AoE (Area of Effect). This is because many rush decks follow the idea of cheap, weak units and therefore get easily countered by some control cards like Voidsurgers or Bladestorm. Headstart is a very strong card in regards to the mana to strength ratio, as it is +1 strength above Lawless Herd at every level.
That being said it has a slight drawback of not offering full control of where to place it, therefore it can never be used defensively. Since you decide when to play this card, look to control where the token is going to land by playing out your other cards first.
It is important to note that if your Lawless Herd is ever +1 level higher than your Headstart, then you should use Lawless Herd over Headstart since it is virtually the same card except you get the added benefit of controlling where to play it.
This card is meant to be played at times where you want to keep frontline since it is one of the highest strength units in this deck and very cheap in mana for what it’s worth. It is great to play when you aim to do massive pushes in future turns, however since it will take two turns before going into the enemy base, this might not always be the best card when the game is in its final turns (unless you aim to use Forgotten Souls to push it into the base next turn).
Restless Goats
Despite all the negative opinions about Restless Goats, they are actually great at all levels and get much better as they level up. On paper, it seems very low in value and even has negative value attached to it (since you deal 1 damage in exchange for 2 base health at level 1), but specifically in this deck, it absolutely shines.
When playing Swarm rush, your focus is to close out the game as soon as possible and that being said, you should be willing to trade any base health you can to get a lead over your opponent. Since you are expected to win the game before the enemy can even deal high amounts of damage to your base, the self base damage attached to Restless Goats is negligible.
This card serves two main purposes in this deck: a) for Trinity Openers (discussed later) and b) to finish off the enemy since it is one of the few 2-movement units in the deck.
It is not expected to be played in the mid-game because there are other cards that can substitute for the same niche, specifically Gifted Recruits can generally do the same job as Restless Goats outside of the two main purposes listed above. In the mid-game if you have the opportunity to send this card into the enemy base, it’s generally better to keep it on board and make it behave like a Gifted Recruits where it can be used in the corners or to defend a stronger unit.
Wild Saberpaws
Wild Saberpaws should be played for similar reasons as Restless Goats. They can substitute for one another in many cases. One notable difference is that you can manipulate its movement which can prove to be very useful at times. In cases the enemy is doing a good job at defending and it’s impossible to play any movement card since they would just attack into the enemy units, this card can be played as a 0 movement unit and fill the same niche as Head Start.
To reiterate, this card is great in the early and late game: for Trinity Openers in the early game and as a finisher in the late game. In cases where it can be used to fill the same function as Restless Goats, it’s preferable to use this card instead since there is no self base damage drawback.
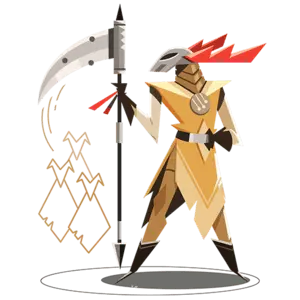
Forgotten Souls
Forgotten Souls serve only one purpose in the entire deck and should never see any play for any other reason. In regards to its mana-to-strength ratio, it is the weakest in the entire deck. Since the focus of this deck is to get lots of damage fast this card should really only be played once in the entire match and it should be the last card played.
There are some rare cases where you may want to use Forgotten Souls to set up a baselock. Otherwise, the only reason to ever play it is to win the match, whether that means to use it to push a weak unit into the base, perhaps combo’d with Potion of Growth or most remarkably with Devastators. At 7 mana, the Devastators + Forgotten Souls combo is a deadly one.
Potion of Growth
Since this deck mostly runs on the basis of cheap and weak units which generally are very susceptible to area of effect cards, we need to find a way to make more obstacles for the opponent to deal with. This is where Potion of Growth steps in.
This card is great for applying instant pressure on the board since you can buff a unit that is bordering the enemy base. Instead of playing three weak units, consider playing two units instead, one weak and the other buffed with Potion of Growth.
It is especially great for baiting out enemy cards that would have been able to counter Devastators. Playing Potion of Growth one turn before you plan on playing a Devastators at the enemy base, is perfect for baiting out spells like Execution or Flaming Stream.
In summary, Potion of Growth should generally be used for three purposes:
- To distribute strength around your units making it difficult for your opponent to clear your frontline.
- To apply instant pressure by buffing a unit at the enemy base/baiting resources.
- As a finisher when combo’d with Forgotten Souls in the late game.
- To vitalize a unit close by your base or cancel out the poison effect.
Since Potion of Growth can vitalize units, it may be preferable to play this card on a poisoned unit to prevent the enemy from using poison synergy cards on it like Marked as Prey or Amberhides. Potion of Growth can also be used in the early game on a unit close to your own base, simply allowing it to grow before it reaches the enemy base.
Shady Ghoul
Shady Ghoul is the third and last card that is capable of performing a Trinity Opener. You might have noticed that I still have this card at level 1—it’s because I do not think this card should be played often in your games. Note that this card is very strong at lower levels/ranks but slowly gets outshined by your other Trinity Opener cards as all your cards level up.
Similar to the Wild Saberpaws treatment, this card behaves very closely to both Restless Goats and Wild Saberpaws. All three of these cards are your go-to early game options for Trinity Openers, as well as your late game cards because they are the only runners in the deck. What separates Shady Ghoul from the other two is that it doesn’t make for the greatest finisher since it has only 1 strength at all levels.
However, one additional niche this card brings is the ability to keep the frontline. Much like how Doppelbocks acts like two units making it difficult for the enemy to reset your frontline, Shady Ghoul does this job even better because the token spawns after Shady Ghoul dies, and in a sense the token is being “protected” as it is invulnerable to Area of Effect damages (unlike Doppelbocks’).
To reiterate, this card should only be played in the early game for Trinity Openers and in the late game specifically when you are in desperate need of keeping the frontline.
Personal servers
Personal Servers is a very fitting 3 mana card in this deck because of its versatility. This card can be used to accomplish several goals such as: move frontline forward, buff a unit to create more pressure, act as a guardian to defend your stronger units and for potential lethal since it can behave like a Potion of Growth substitute.
For 3 mana this card has proven to be very useful. It is not the most important card in the deck nor is it the worst—just a great card to pick up when playing this deck. Typically you should aim to play this card during an odd mana turn (e.g. 5, 7…) and use up the remaining mana with your even-cost units.
Temple of the Heart
Temple of the Heart is an extremely niche card and completely changes the flow of the game. When played properly, this card can become your enemies’ worst nightmare. It has a relatively weak statline so you need to actively be looking for good places to set this down for at least 1 trigger to receive value from it. There are some cases where Temple of the Heart can be used to set up disguised lethals because of the mechanical order of the game.
At the start of your turn the Temple is triggered (2 damage) followed by your units marching into the enemy base (X damage) and now you are given freedom to play out your turn as necessary (Y damage). The addition of this card into the deck makes this variation the most difficult to play, it is not recommended for the majority of players.
For more information on how Temple of the Heart works, you can check out this video.
Devastators
The one that makes your victories feel cheap, the one that puts Winter players to sleep, the one that makes structure players weep, Devastators, Devastators, Devastators. Undoubtedly the best card in the deck. This will be your go-to card that should be played as soon as possible depending on how fast you can set up your board.
On its own, Devastators is a fairly weak card because it can get cleared easily, however with the help of other units and proper positioning, this card can deal absurd amounts of damage to the enemy base. Think of Devastators like the egg of a beast. All alone, Devastators will get eaten up by all the other cards in the game but with proper care and consideration, a beast will hatch and deal massive damage to the enemy. Devastators’ favourite tiles are both top corners on the left and right, as these tiles are the most difficult for the opponent to reach.
Although tearing down structures might look so satisfying, there are actually many cases where it’s better to leave up the enemy structure for a few turns. If the enemy structure is played on a centre tile bordering the enemy base, you can take advantage of the enemy corner and drop Devastators there instead. In cases where the structure is in the corner, you may want to leave it up so that on your 7 mana turn, your Devastators + Forgotten Souls has a clear path into the enemy base. In the early game however, if you have the ability to play Devastators safely (meaning it is protected by one or more units) and also destroy a structure, then this is generally the best play.
There is quite a lot to expand on the formula behind Devastators which will be explained later but for now just be sure to almost never cycle this card as it is almost always better played than cycled especially in the lower ranks where you are able to pull off sneaky Devastator plays much more frequently.
Snowmasons
I want to include a quick overview on this card for those that decide to run the Snowmasons variation. Snowmasons can act as a healthy substitute for Potion of Growth when using it as a finisher or simply to make a unit stronger. Generally, you do not want to self-activate Snowmasons by making it attack into enemy units because every bit of strength counts and you want to utilise Snowmasons weak body to protect one of your stronger units.
In situations where you don’t have Devastators in hand, you can use both Snowmasons and a unit to stimulate pressure by using Snowmasons as a guardian and the other unit to act like Devastators.
Flameless Lizards
The Flameless Lizards variation works better as you climb up the ranks because most decks will be running AoE cards but lacking single target removal cards. By replacing Devastators with Flameless Lizards, the deck requires more speed so often times it’s best to replace Personal Servers with First Mutineers as well.
Flameless Lizards is a solid drop on 5 mana as there are very few cards the enemy can use to clear it. Thus, your frontline will often hold and if Flameless retains most of its strength, a Forgotten Souls on the following turn can end the game. A neat trick is to replace Potion of Growth with Spare Dragonling as well. Spare Dragonling can act as a cheaper and more effective Potion of Growth with the Flameless Lizards setups. The enemies will often times be unsuspecting of these strong setups. With the inclusion of this card, it’s important to always be cycling back for it fast because it is the very heart of the deck.
Game openers
Within the RR decks, there exists a total of three 2-movement units—each of these cost three mana or less and are necessary for preforming any Trinity Opener.
- Restless Goats
- Shady Ghoul
- Wild Saberpaws (although not always 2-movement)
Simply put, a Trinity Opener is pushing your frontline to three tiles forward on your very first turn. In doing so you open up the entire board and give yourself the ability to play a unit on any tile. By maintaining this frontline you give yourself a huge advantage over your opponent.
Here are all the possible Trinity Openers at 3 mana:
And at 4 mana:
- Restless Goats + Green Prototypes
- Restless Goats + Gifted Recruits
- Restless Goats + Doppelbocks
- Wild Saberpaws + Green Prototypes
- Wild Saberpaws + Gifted Recruits
- Wild Saberpaws + Doppelbocks
- Restless Goats + Wild Saberpaws (either way)
- Shady Ghoul + Green Prototypes
- Green Prototypes
1
 3
3 - Summon Militia
1
 3
3 - Doppelbocks
2
 3
3 - Gifted Recruits
2
 3
3 - Head Start
2
 3
3 - Restless Goats
2
 3
3 - Wild Saberpaws
2
 3
3 - Forgotten Souls
3
 3
3 - Personal Servers
3
 3
3 - Potion of Growth
3
 3
3 - Shady Ghoul
3
 3
3 - Devastators
4
 3
3
Trinity opener example 1: Shady Ghoul + Green Prototypes
- Green Prototypes
1
 3
3 - Summon Militia
1
 3
3 - Doppelbocks
2
 3
3 - Gifted Recruits
2
 3
3 - Head Start
2
 3
3 - Restless Goats
2
 3
3 - Wild Saberpaws
2
 3
3 - Forgotten Souls
3
 3
3 - Personal Servers
3
 3
3 - Potion of Growth
3
 3
3 - Shady Ghoul
3
 3
3 - Devastators
4
 3
3
Trinity opener example 2: Restless Goats + Green Prototypes
- Green Prototypes
1
 3
3 - Summon Militia
1
 3
3 - Doppelbocks
2
 3
3 - Gifted Recruits
2
 3
3 - Head Start
2
 3
3 - Restless Goats
2
 3
3 - Wild Saberpaws
2
 3
3 - Forgotten Souls
3
 3
3 - Personal Servers
3
 3
3 - Potion of Growth
3
 3
3 - Shady Ghoul
3
 3
3 - Devastators
4
 3
3
Trinity opener example 3: Wild Saberpaws + Green Prototypes
When given multiple options, you should prioritise the Trinity Opener that grants you the most value based off your card levels. Therefore, there is no one absolute best opener, it depends on the value of your cards.
Trinity Openers are the best turn 1 openers for RR because it is very hard for the opponent to match them. Generally speaking you should still be able to maintain this frontline for the duration of the match. A three mana trinity opener can lead to a 4 mana Devastators in the corner in your next turn. A four mana trinity opener can lead to either a Devastators + Green Prototypes play or a Gifted Recruit + Potion of Growth play.
It’s important to note that semi-Trinity Openers exist where you push your frontline only two tiles forward, however (instead of one) you have two units controlling the same row, preferably centre-left and centre-right.
Since they move up at the start of your next turn, you still have good frontline over the board. However, there are far too many semi-Trinity Openers for me to list in this guide, just know that each requires at least one of the Trinity cards (Restless Goats, Wild Saberpaws or Shady Ghoul).
- Green Prototypes
1
 3
3 - Summon Militia
1
 3
3 - Doppelbocks
2
 3
3 - Gifted Recruits
2
 3
3 - Head Start
2
 3
3 - Restless Goats
2
 3
3 - Wild Saberpaws
2
 3
3 - Forgotten Souls
3
 3
3 - Personal Servers
3
 3
3 - Potion of Growth
3
 3
3 - Shady Ghoul
3
 3
3 - Devastators
4
 3
3
Two reasons as to why Trinity Openers are so important:
- You get immediate frontline which you can take advantage of in your following turns.
- You give yourself the opportunity to get extremely early and well defended units such as Devastators or a 2-mana unit + Potion of Growth.
Prioritisation
The RR prioritisation refers to being able to distinguish which cards you should aim at playing over others in any given situation. This idea can extend to which enemy units/structures you should focus on killing as well. Which and how you prioritize cards will vary depending on each and every unique turn given a new board state. However, while prioritisation differs largely, there are some rules you can apply to your gameplay to produce the most value/best results for each given turn.
Devastators is one of the most impactful cards in RR. It is considered a high-risk/high-reward card because for 4 mana you can get away with dealing up to 12 damage to the enemy base (at level 5, up to 6 at level 1) but at the same time you’re only playing a 6 strength unit—in this case, you’re better off playing other alternatives like Gifted Recruits and Wild Saberpaws.
Playing Devastators without Forgotten Souls is a bit of a gamble. If the enemy doesn’t have the cards to counter it, you can win the game simply from this play. But you can also lose the game if the enemy is able to defend against it and delay your rush.
Devastators is also great for removing structures, and when enemies play buildings in the corners, you can leave them up until late game for an easy Devastators + Forgotten Souls combo straight into the enemy base.
- Green Prototypes
1
 3
3 - Summon Militia
1
 3
3 - Doppelbocks
2
 3
3 - Gifted Recruits
2
 3
3 - Head Start
2
 3
3 - Restless Goats
2
 3
3 - Wild Saberpaws
2
 3
3 - Forgotten Souls
3
 3
3 - Personal Servers
3
 3
3 - Potion of Growth
3
 3
3 - Shady Ghoul
3
 3
3 - Devastators
4
 3
3
Using the enemy’s structure as a way to baselock them.
- Green Prototypes
1
 3
3 - Summon Militia
1
 3
3 - Doppelbocks
2
 3
3 - Gifted Recruits
2
 3
3 - Head Start
2
 3
3 - Restless Goats
2
 3
3 - Wild Saberpaws
2
 3
3 - Forgotten Souls
3
 3
3 - Personal Servers
3
 3
3 - Potion of Growth
3
 3
3 - Shady Ghoul
3
 3
3 - Devastators
4
 3
3
In this case, Devastators would usually attack towards the centre, but because the structure is in front, Devastators will attack forward instead. With boards exactly like this in the late game, Devastators + Forgotten Souls combo is brutal because the enemy does not expect the Devastators to go through the structure.
Since a large portion of the extra damage comes from its effect, you can take advantage of it by keeping Devastators alive even with just a sliver of health. Although a full strength Devastators at the enemy baseline is quite threatening, even a one strength Devastators can be the enemies highest priority target on the board. Sometimes your enemies may even be forced to play an Execution on a one strength Devastators to prevent the damage.
In lower leagues, since players don’t typically play decks with good removal, aim to play Devastators as much as possible because you are generally rewarded in most of these exchanges.
Although Devastators is a high-risk/high-reward card, there are ways to minimise the risks when playing this card. By expanding on what we have already learned, Trinity Openers are amazing for setting up an early Devastators. It is important to note that the earlier into the match you set down Devastators, the harder it is for your enemy to deal with it because of mana constraints. After a turn 1 Trinity opener, assuming the enemy was unsuccessful in clearing both units, you can get an early Devastators tucked into either the top left or top right corner. These are Devastators’ two favourite tiles on the board.
- Green Prototypes
1
 3
3 - Summon Militia
1
 3
3 - Doppelbocks
2
 3
3 - Gifted Recruits
2
 3
3 - Head Start
2
 3
3 - Restless Goats
2
 3
3 - Wild Saberpaws
2
 3
3 - Forgotten Souls
3
 3
3 - Personal Servers
3
 3
3 - Potion of Growth
3
 3
3 - Shady Ghoul
3
 3
3 - Devastators
4
 3
3
Extremely aggressive second turn swing with 5 mana.
In a situation like above, the enemy needs to find a way to clear the Devastators. This can only be done in a limited number of ways due to mana constraints. A fair trade in mana for the enemy would be using Execution in exchange to kill the Devastators. However, it is important to realize that if the enemy does not have a way to use up the excess mana, the Execution is effectively costing more than 4 mana and you automatically win in this exchange.
In the case that the enemy is able to use up the excess mana, if your defending unit is still alive, you will be able to use it to defend another high priority unit. During your next turn, it will move forward allowing you to pull off yet another top corner tuck play, generally this is best accomplished with a unit + Potion of Growth, once again setting down a high priority target for the enemy to deal with.
- Green Prototypes
1
 3
3 - Summon Militia
1
 3
3 - Doppelbocks
2
 3
3 - Gifted Recruits
2
 3
3 - Head Start
2
 3
3 - Restless Goats
2
 3
3 - Wild Saberpaws
2
 3
3 - Forgotten Souls
3
 3
3 - Personal Servers
3
 3
3 - Potion of Growth
3
 3
3 - Shady Ghoul
3
 3
3 - Devastators
4
 3
3
In most cases, playing Gifted Recruits top right would have been the better play, but I specifically played Gifted Recruits top left here to avoid 2 movement units from defending. The Restless Goats from last turn is still acting as a defender for another high priority target.
By applying pressure every turn you snowball your early game lead in hopes to close out the game fast. This deck doesn’t fare well into the late game so you really want to squeeze in any advantages you can. The biggest takeaway from prioritisation is playing Trinity Openers on your first turn if possible and to really focus on playing Devastators as much as possible and as early as possible. Especially in the lower ranks, this strategy works exceptionally well because opponents do not have many ways to defend against it.
Cycling
Cycling is the most wrongfully used mechanic in the game. In basic terms, cycling refers to the “flow of cards” in your deck and by definition reflects which cards you will draw in your future turns. The cards you draw each turn are NOT at random, instead there is a certain pattern the cards follow. Therefore, you can actually predict which will be your next cards drawn with rather high accuracy.
Refer to the drawing guide to learn more about drawing mechanics. You can also practice cycling and see all how drawing works by going to Tools > Deck Builder, then in the sub-menu Practice.
What’s special about cycling is that it is actually a controllable mechanic to some degree. Each turn you are given an opportunity to trade 1 card in your hand in exchange for another one in your deck. Additionally, the order in which you play your cards will greatly affect which ones will be drawn back sooner.
Since this deck is a rush deck, you will be cycling through your deck very fast, meaning you will be given multiple options of cards to play each turn. Linking this back to prioritisation, you need to use the cards that create the best play for that turn and cycle out the cards that aren’t useful in this turn and the next few.
The biggest trouble players find with this mechanic is not knowing when to cycle, and how to cycle. In this rush deck where the value of cards changes depending on the state of the match (early-, mid-, late-game), you need to really cycle out the useless ones so you have better chances of drawing the best cards in your deck.
As a basic rule, you generally want to cycle one card every turn. This is mostly because Devastators is the best card in the deck, and after playing it, you should be fishing to draw and play it again. Given the nature of this complex game, this rule is not always the correct play.
You should be aiming to maximise your usage of Devastators and on the other side of the spectrum, minimise your usage of Forgotten Souls. Bear in mind that these two cards make an amazing combo, so the next question you should be asking is, how do I properly set up this combo? Ideally you want to play this combo exactly when it is available (at the 7-mana turn) and this requires a bit of timing, thinking and luck.
Forgotten Souls is in fact the highest priority cycle for the majority of the game. The only time this card should stay in your hand for more than 1 turn is when you are really sure that the game will be closing out very soon and it would be unwise to cycle this card out as it could be needed for winning.
Additionally, if you really suspect you will pull off a Devastators + Forgotten Souls combo next turn, you should keep it in your hand. Outside of those two reasons, this card should be cycled and never stay in your hand for more than one turn. Once you master cycling, it just becomes natural to know which cards to cycle and when.
Standard cycling rules:
- You want to be cycling more often than not. This rule is true for every RR match.
- As far as cycling prioritisation goes, Forgotten Souls has the highest priority, Summon Militia is second and Snowmason is third. This rule is not always true as it really depends on the state of the board and your expectations for which card you will receive after cycling.
- By playing Devastators in the early game, and cycling Forgotten Souls in the early game, you can expect to draw them both back around the same time for a combo.
- Since your card levels will differ, aim to play out your best/higher level cards, and cycle out your worst/lowest level cards.
- Almost never cycle Devastators, and it’s okay to keep this card in your hand for many turns because each turn you should be looking to make a Devastators play setup. As you rank up, Devastators progressively become harder to set down without risk and it may be common to cycle this card only in the early game.
At face value you can only see 4 cards in your deck every turn. Once you master cycling you can actually see a 5th card in your hand every turn and cycling for lethal no longer becomes luck, but instead a skillful trait.
Order
Now that we have covered cycling, we can start learning about order which refers to the order in which you play your cards.
Outside of prioritisation and cycling, order plays a very significant role that usually goes unnoticed to the inexperienced player. At the basic level players start developing an idea behind how to properly utilise order to their advantage because it is the most logical play.
For instance if the enemy has a unit placed near their base for defense, you will play out the cards to remove that enemy unit first before playing your 2 movement unit in hand that can be used for lethal. In more complex cases, order starts becoming debatable between which cards should be played first, second, third or fourth.
- Green Prototypes
1
 3
3 - Summon Militia
1
 3
3 - Doppelbocks
2
 3
3 - Gifted Recruits
2
 3
3 - Head Start
2
 3
3 - Restless Goats
2
 3
3 - Wild Saberpaws
2
 3
3 - Forgotten Souls
3
 3
3 - Personal Servers
3
 3
3 - Potion of Growth
3
 3
3 - Shady Ghoul
3
 3
3 - Devastators
4
 3
3
In this case, there is only one proper order for lethal: Wild Saberpaws → Green Prototypes → Forgotten Souls.
- Green Prototypes
1
 3
3 - Summon Militia
1
 3
3 - Doppelbocks
2
 3
3 - Gifted Recruits
2
 3
3 - Head Start
2
 3
3 - Restless Goats
2
 3
3 - Wild Saberpaws
2
 3
3 - Forgotten Souls
3
 3
3 - Personal Servers
3
 3
3 - Potion of Growth
3
 3
3 - Shady Ghoul
3
 3
3 - Devastators
4
 3
3
In this case, Green Prototypes need to clear Gifted Recruits first so Wild Saberpaws can have 2-movement.
There are two parts behind the concept of order:
- The Present Value of Order (PVO),
- The Future Value of Order (FVO).
The aforementioned situations are illustrating the present value of order (PVO) because the order in which I play my cards this turn, will determine the state of the board/game for this turn and the next turn. The PVO has everything to do with prioritisation—for instance do you want the Doppelbocks’ token to be more forward than the Green Prototypes or vice versa?
As demonstrated earlier, sometimes the order in which you play your cards will have an affect on the PVO. This becomes more obvious during turns where you want to play RNG (luck-based) cards like Summon Militia and Head Start.
- Green Prototypes
1
 3
3 - Summon Militia
1
 3
3 - Doppelbocks
2
 3
3 - Gifted Recruits
2
 3
3 - Head Start
2
 3
3 - Restless Goats
2
 3
3 - Wild Saberpaws
2
 3
3 - Forgotten Souls
3
 3
3 - Personal Servers
3
 3
3 - Potion of Growth
3
 3
3 - Shady Ghoul
3
 3
3 - Devastators
4
 3
3
Devastators must be played first, before playing Head Start, otherwise Head Start token will block off access to the top right corner tile.
Since RNG-based cards like Summon Militia and Head Start have a certain amount of available tiles they can land on, you can adjust your play depending on where you want these tokens to land. For instance, if I want these tokens to land on specific tiles, I can increase the chance of them landing there by occupying the other tiles.
- Green Prototypes
1
 3
3 - Summon Militia
1
 3
3 - Doppelbocks
2
 3
3 - Gifted Recruits
2
 3
3 - Head Start
2
 3
3 - Restless Goats
2
 3
3 - Wild Saberpaws
2
 3
3 - Forgotten Souls
3
 3
3 - Personal Servers
3
 3
3 - Potion of Growth
3
 3
3 - Shady Ghoul
3
 3
3 - Devastators
4
 3
3
I want the Head Start token to land on the left, so I play Wild Saberpaws on the right first.
You don’t always want to play your RNG cards last—sometimes your move will be dependent on how the RNG plays out and thus you may want to play them first.
In the following example, I want to be as aggressive as possible. To increase the chances of the Summon Militia token to spawn hopefully on the furthest row possible, I play it first followed by Head Start. Depending on where these tokens land I will determine which unit I want to buff with Potion of Growth.
- Green Prototypes
1
 3
3 - Summon Militia
1
 3
3 - Doppelbocks
2
 3
3 - Gifted Recruits
2
 3
3 - Head Start
2
 3
3 - Restless Goats
2
 3
3 - Wild Saberpaws
2
 3
3 - Forgotten Souls
3
 3
3 - Personal Servers
3
 3
3 - Potion of Growth
3
 3
3 - Shady Ghoul
3
 3
3 - Devastators
4
 3
3
- Green Prototypes
1
 3
3 - Summon Militia
1
 3
3 - Doppelbocks
2
 3
3 - Gifted Recruits
2
 3
3 - Head Start
2
 3
3 - Restless Goats
2
 3
3 - Wild Saberpaws
2
 3
3 - Forgotten Souls
3
 3
3 - Personal Servers
3
 3
3 - Potion of Growth
3
 3
3 - Shady Ghoul
3
 3
3 - Devastators
4
 3
3
The Summon Militia token did not land where I wanted it to, however this order was still correct. Since my right hand column is pretty powerful, I want to distribute the strength evenly across the board so I use Potion of Growth on the Green Prototypes.
Now that PVO has been covered, let’s talk about FVO which has everything to do with cycling. In cases where the PVO does not change depending on order, the next step in regards to order is the FVO.
Although the order in which two cards are played does not affect the state of the board, the order does affect which one I am more likely to draw back first. This is referred to as the FVO and it largely depends on which cards you prioritise having later on in the match. For instance, in the case where I prioritise having Restless Goats in the late game for lethal over Gifted Recruits, I will play Restless Goats first to increase my chances of drawing it back faster.
Put simply, the cards you play first will have a higher chance to be drawn back, therefore during Devastator turns, it is always better to play Devastators first (if possible) and any other defenders should be played afterwards. However, it is important to note that PVO takes priority over FVO, if order does not impact PVO, you should start thinking about how order impacts FVO.
Next lies the question, what about cycling? When should I cycle the card in my hand? Since cycling plays an impact on both PVO and FVO, you need to really consider numerous factors before cycling (PVO because you could draw a better card in your hand which results in better play, and FVO because you can cycle after playing a card to increase the chances of drawing both of them back around the same time). First let’s talk about how it impacts PVO.
Haven’t you ever experienced turns where you have a bad hand so you cycle before playing anything and the best play becomes clear? This is exactly how cycling affects PVO and in cases where you have a mediocre or simply bad hand, you will always want to cycle first just for a chance that you can draw a better card which makes for a better play.
- Green Prototypes
1
 3
3 - Summon Militia
1
 3
3 - Doppelbocks
2
 3
3 - Gifted Recruits
2
 3
3 - Head Start
2
 3
3 - Restless Goats
2
 3
3 - Wild Saberpaws
2
 3
3 - Forgotten Souls
3
 3
3 - Personal Servers
3
 3
3 - Potion of Growth
3
 3
3 - Shady Ghoul
3
 3
3 - Devastators
4
 3
3
Shady Ghoul does not see any play here and therefore is a liability and is worth cycling first to see if I can draw for a better play. For example a Devastators or Gifted Recruits draw here is much better than Shady Ghoul.
In cases where your hand is relatively good and the chances to draw an even better hand is extremely low, then it’s safe to ignore PVO and focus on FVO. Now you want to cycle in such a way that the cycle either cuts in between the order you play your cards or is used up at the end.
- Green Prototypes
1
 3
3 - Summon Militia
1
 3
3 - Doppelbocks
2
 3
3 - Gifted Recruits
2
 3
3 - Head Start
2
 3
3 - Restless Goats
2
 3
3 - Wild Saberpaws
2
 3
3 - Forgotten Souls
3
 3
3 - Personal Servers
3
 3
3 - Potion of Growth
3
 3
3 - Shady Ghoul
3
 3
3 - Devastators
4
 3
3
Since Devastators is such a high priority card here, it’s worth playing first before cycling. Afterwards I can determine whether I want to play Head Start first and then cycle, or cycle first to see if I can draw a better play. The chances of me drawing an even better play than this is low, so I cycle last specifically because I would rather draw back Head Start sooner than Wild Saberpaws.
When using cycling to impact the FVO, you can use it to “link” cards together. Linking cards is great for future combo setups like Devastators + Forgotten Souls. In the following example I want to link Devastators and Forgotten Souls together, so I cycle Forgotten Souls right after playing Devastators and before I play Green Prototypes. In doing so I have a relatively high chance of drawing both of them back around the same time for the future.
- Green Prototypes
1
 3
3 - Summon Militia
1
 3
3 - Doppelbocks
2
 3
3 - Gifted Recruits
2
 3
3 - Head Start
2
 3
3 - Restless Goats
2
 3
3 - Wild Saberpaws
2
 3
3 - Forgotten Souls
3
 3
3 - Potion of Growth
3
 3
3 - Shady Ghoul
3
 3
3 - Unhealthy Hysteria
3
 3
3 - Devastators
4
 3
3
The most important takeaway from this section is to look at how the order you play out your turn affects PVO and FVO, and always remember that PVO takes priority over FVO. There should always be a pattern in your gameplay and a reason to your plays. Without rhyme or reason, your plays become significantly worse.
One last thing to remember regarding order is the order in which your units will move forward at the start of your turn: top row to bottom row and from left to right. The top left unit will move up first and the bottom right unit will move up last. This is a very important consideration for both order and positioning.
Positioning
If it wasn’t obvious already, positioning refers to how you position your units on the board. I think this is one of the most difficult things to master and even at higher level gameplay, players struggle with it. Positioning depends on two things:
- What do you plan to do with your units,
- What does the opponent plan to do with your units.
As a rush deck, you generally want to ignore the enemy units unless you need to attack them to make space for your other units, takeover certain tiles or just to defend as a last resort.
We’ve already discussed Trinity Openers, and they are a great demonstration of how the center tiles are high priority cells that you want to occupy as well as both of the corner tiles.
As mentioned earlier regarding order, there are many synergies that exist in Stormbound because of this. Specifically for the RR deck, there are about three cards you want to keep in mind when playing. Restless Goats, Snowmasons and Shady Ghoul.
Restless Goats
If you have 2 health or less but you have lethal with Restless Goats, you will win this match (since defense gets resolved first, which is the opponent during your turn). That being said, since the order of attacking goes from left to right, Restless Goats is better played right-side over left-side. This matters in situations where you have multiple units lined up at the enemy base—you want Restless Goats to be towards the right if possible otherwise you risk taking 2 damage before the rest of your units go forward and lose the match.
Snowmasons
The positioning of the next two cards only matter in the Snowmasons variation. Due to the movement order, Snowmasons love the centre right column more than any other since it allows you to guard a high priority unit on the top right corner. By clearing the Snowmasons, the opponent essentially buffs the next unit, needing more mana to take care of it.
If, on the other hand, we recreate this situation on the left side of the board, the high priority top left corner unit will move into the enemy base before the Snowmasons and thus the Snowmasons buff goes to waste. This is why Snowmasons is better played to the left of any unit.
Shady Ghoul
If used as a Trinity Opener, always aim to use Shady Ghoul centre left rather than centre right. Let’s say your opponent plays a 1 movement in the same column as Shady Ghoul—IF (and this works only in this RNG situation) the token bounces back meaning it stays in the same column but one tile separating the enemy unit, you could play snowmasons on centre right and then on your opponent’s turn, the board looks like this:
With this setup the opponent might have a lot of trouble thinking of the best play. Either they clear the Snowmasons and buff the token, or don’t and lose board control—not to mention giving you a nice top right corner setup for you next round. Assuming the same situation only difference is that you played Shady Ghoul centre right, you end up with Snowmasons center-left, which is less valuable as we’ve previously discussed.
General tips
Outside of these very particular cases, positioning is one of the most important aspects of the game. We know that Devastators is one of the best cards in our deck, and if defended properly, it can deal some massive damage to the enemy base.
Therefore we need to position our units in the best way possible to defend our Devastators. This is why Devastators are better played in the top corners (indifferently) because it makes it very difficult for the enemy to access that tile with proper defense.
One pattern you don’t want to fall into is blocking off tiles that would be great for other units like Devastators. Aim to avoid blocking off the corner tiles with weak units, instead use those weak units as guardians for stronger units.
Positioning is also dependent on which faction the enemy is playing. Against Shadowfen which has a lot of AOE and bordering damage cards, you should aim to make a square formation so that it’s difficult to access the rest of the units, the square formation renders bordering damage cards nearly useless.
- Green Prototypes
1
 3
3 - Summon Militia
1
 3
3 - Doppelbocks
2
 3
3 - Gifted Recruits
2
 3
3 - Head Start
2
 3
3 - Restless Goats
2
 3
3 - Wild Saberpaws
2
 3
3 - Forgotten Souls
3
 3
3 - Personal Servers
3
 3
3 - Potion of Growth
3
 3
3 - Shady Ghoul
3
 3
3 - Devastators
4
 3
3
Example of a square attack formation, particularly efficient against Shadowfen.
Assuming the Shadowfen player uses Toxic Sacrifice, an even better idea is to separate your units as far apart as possible, hugging the left and right side columns to avoid surrounding AoE damages.
Example of a side attack formation to avoid AoE damage.
On the other hand, you have line formation which is also very good at stopping bordering effects but is even better to counter 1 movement unit defenses. The weakness to the line formation is it falls weak to 2 movement or more unit defenses, especially against Twilight Prowlers and Windmakers.
- Green Prototypes
1
 3
3 - Summon Militia
1
 3
3 - Doppelbocks
2
 3
3 - Gifted Recruits
2
 3
3 - Head Start
2
 3
3 - Restless Goats
2
 3
3 - Wild Saberpaws
2
 3
3 - Forgotten Souls
3
 3
3 - Personal Servers
3
 3
3 - Potion of Growth
3
 3
3 - Shady Ghoul
3
 3
3 - Devastators
4
 3
3
Example of a horizontal attack formation, effecient against decks without too many runners.
Next we have the traditional diagonal formation, this will be your most used formation as it usually follows the turn after a Trinity Opener. The opponent has to spend a lot of resources dealing with this setup. If used in the early game, the mana constraint makes it even more difficult for them.
- Green Prototypes
1
 3
3 - Summon Militia
1
 3
3 - Doppelbocks
2
 3
3 - Gifted Recruits
2
 3
3 - Head Start
2
 3
3 - Restless Goats
2
 3
3 - Wild Saberpaws
2
 3
3 - Forgotten Souls
3
 3
3 - Potion of Growth
3
 3
3 - Shady Ghoul
3
 3
3 - Unhealthy Hysteria
3
 3
3 - Devastators
4
 3
3
Example of a typical early on diagonal attack formation.
Positioning plays a key role in how the board will look in the future. I generally play off this idea of left-side vs right-side, you want to pressure one side and force your enemy to defend that side only to start pressuring the other side until they can’t keep up.
Always try to make openings for your own cards, the last thing you want is to block yourself off from potential tiles and even potential lethals. Additionally, if you plan on doing a Devastators + Forgotten Souls combo for next turn, you want to make sure you find ways to leave an open space for them, even if that means clogging up all your units on one side to leave the other side open.
Advanced Rush Theory
Now that we have successfully covered all the major topics of how to play this deck, let’s combine it all together.
Let’s start with common assumptions you can integrate to optimize your gameplay.
- The enemy will always attack the furthest unit.
- The enemy will always try to reduce the total damage they will take (usually done by targeting high-threat units).
- The enemy will typically play cards that are in meta.
Now that we have a foundation for what to expect from the enemy, we can find ways to play around them. Starting with the first assumption, the root of a Trinity Opener stems from this idea. We can expect that the second unit played in the Trinity Opener will be targeted and this typically means the first unit is left uncontested. Our next plays will typically rely on using the uncontested unit as a Defender for a stronger unit.
In regards to Trinity Openers, there are several variations that exist and are strongly dependent on what your opponent is playing. Starting at 3 mana, there are only two trinity opener positions you should study. Both of these require you to play either Saberpaws or Restless Goats on one of the center tiles. The only difference now is where to place your Green Prototypes. The most notable position is having your Green Prototypes occupy the other center tile. This allows for a potential mana 4 Devastators on either corner if either of these two units are uncontested.
Otherwise the second idea would be to position your Green Prototypes in the opposite far corner tile. This setup is great to prevent a potential enemy Green Prototypes + Linked Golems (only works if the enemy Green Prototypes is stronger than yours) or even an enemy Crimson Sentry. Generally this trinity opener is used against Shadowfen, it is slightly less aggressive but less risky. Moving onto the 4 mana trinity openers, there are several variations because the enemy is given the first turn.
It is important to note that Doppelbocks is incredibly strong for all 4 mana trinity openers and should be actively played if given the opportunity. Starting with the easiest of positions, when your opponent plays nothing on the board, you proceed with two units occupying the center tiles. Next is if the enemy plays a structure, the position of the structure matters as well. A corner structure (most common placement) should be met with the trinity runner on the column bordering the enemy structure’s column and the second unit on the other center tile.
Essentially, this will bait the enemy into defending the right hand side because the furthest unit is positioned there, and this leaves us a clean board to set down Devastators top left, applying pressure and destroying the structure along the way. A center tile structure will be met with the trinity runner on the opposite center tile and the second unit on the bordering column.
The goal here is not to destroy the structure, but rather keep it there for the remainder of the game and plug in units on the corner that the enemy cannot defend because the structure essentially defends it. Bear in mind that in both structure cases, you also have the additional opportunity to keep enemy structures up allowing for smoother baselocks or even a perfect path for a Devastators + Forgotten Souls combo. Next up is analyzing 0 movement units. If the enemy plays a 0 movement unit in a corner tile, you want to position the second unit on the center tile bordering it.
Applying the first assumption, the enemy will likely defend against the Gifted Recruits and by pushing their units all on one side, we can take advantage of the other side. That is, to play a heavy unit on the enemy top left. Assuming the enemy plays the 0 movement unit on the center, you want to recreate the same situation. Play the second unit on the column bordering it. This leads to the same situation as mentioned previously.
The most common enemy first turn play will be opening with a 1 movement unit, your goal here is to avoid it and push your most forward unit on that same side. This setup will likely lead to the same situation mentioned before as well.
There is one very tricky and rare case Trinity Opener that can be extremely beneficial to your gameplay. By applying the first assumption, we often will be left with one unit on the board, that is the trinity runner. Instead of doing setups where the trinity runner acts as the only guardian, with 5 mana, you will sometimes have opportunities to set down two units. In this case it’s even more powerful to have both these units on the enemy baseline and have the trinity runner as a defender. Thus, instead of setting up the board like mentioned last time, we can play all our units on one side like so.
Assuming your most forward unit is attacked but your trinity runner is left unscathed, this will often lead to positions where you can capitalize on the forward unit by accompanying it with two other units.
What you are seeing here is one of the most powerful 5 mana turns for RR as it is extremely difficult for the enemy to defend against this board. Lastly we can analyze what happens if the enemy plays a 2 movement unit for their starting turn. Simply put, avoid it and play aggressively. Your aggression should be more powerful than the enemy’s and you can withstand the damage from the runner. In some cases however, against an enemy deck that is just as aggressive as yours, you might consider having to defend against it only by setting back their early game frontline. The best case scenario is if you have the opportunity to both clear the enemy unit and set up a trinity opener.
Once the art of cycling has been mastered, you should be confident enough to play as if you’re playing with 6 cards in your hand. One of the major goals of cycling is pairing Devastators and Forgotten Souls together like glue because this is a nasty combo in the late game. There are two common cycling techniques I implement in all my games. Fast Cycling is essentially an attempt to speed up the rate at which your cards appear. Slow Cycling would be slowing down that rate so that you can draw into new cards at a slower rate. You can manipulate cycles not only by choosing whether to cycle or not, but also by deciding on playing more cards. For example for 3 mana you could play Shady Ghoul, but it might be more beneficial to play Doppelbocks and Green Prototypes simply to speed up your cycles. Conversely you could play Shady Ghoul instead to slow down your cycles. Fast cycling is extremely useful for two main purposes. The first is to play out your best cards (determined by card levels) and fast cycle to draw them back as soon as you can. The second is to fast cycle because you have a certain card in mind that you want to draw back in the near future. For those in the lower leagues I encourage fast cycling over slow cycling because level disparity between your own cards likely exist and you want to always be playing out your best ones as often as possible. Combining order with cycling, the order that you play out your cards is extremely important for managing your cycles. You must be decisive between either cycling before playing a card or cycling after playing the card because these orders will strongly affect your future card draws. These decisions are completely dependent on numerous factors and require practice for each new situation to master. A solid example of how to use fast cycles is by cycling away your Forgotten Souls in the early game. This will ensure that Forgotten Souls will return to your hand during a turn when it’s more playable and sometimes even close out games.
By manipulating your cycles, you should have a general idea of which cards you can expect in the near future and even set up a board predicting their arrival.
Cycle prioritization:
- Forgotten Souls
- Shady Ghoul
- Summon Militia
This is a very general rule I follow when deciding on what to cycle out. When two or more of these are in your hand, you should be cycling the ones that are highest ranking (Forgotten Souls should be cycled before Shady Ghoul). This rule is not always true as new scenarios require new ideas and these can become the most important cards to keep in your hand.
Upgrading prioritization:
- Devastators
- Restless Goats
- Wild Saberpaws
This is the order that you want to be upgrading your cards. Bring your Devastators to make level first, next Restless Goats and then Wild Saberpaws. Devastators is the very core of this deck and which higher levels means even more opportunities for crazy lethals. Restless Goats is the most reliable runner in the deck and is necessary for closing out games fast. Wild Saberpaws is also a great runner but has some restrictions to its movement so it is ranked after Restless Goats. It’s recommended you save up your fusion for leveling up these cards in that order.
Last minute tips:
- If you want to practice cycling, head over to the practice tool. Plan out your turns as if you were playing a real game and make your own predictions for which cards you expect to see before they are drawn into your hand. Over time this will provide a deeper insight on how to cycle effectively.
- Play Brawl… but conscientiously. For most players brawl is not the ideal playground to grind for resources, and most will struggle. For those that believe they can reach milestone 4, I strongly urge you to save up a satisfactory amount and attempt to play brawl for the 10 Fusion Stones reward. These fusion stones will stack up quickly and allow you to upgrade any card you desire.
- Always check your shop. Sometimes very useful cards might appear in your shop and these cards are generally worth purchasing despite costing a higher price. This will help accelerate the leveling of your deck and better levels will lead to easy climbing on ladder.
- Practice. This is probably the most annoying yet truthful advice anyone can give you. You don’t become the best overnight and it will require a lot of effort and strength to push to the next level always. If you are really struggling with RR in particular and would like some coaching I would advise you to reach out to me so we can help train your tactics.
That about sums up the Reckless Rush guide, I hope you were able to read up until the very end, hope you learned some things you can apply not only to this deck but also your own decks. Hope you enjoyed reading this guide—if you liked what you saw, feel free to subscribe to my Youtube channel to see how I actually play the deck and see what you can improve on.
Rush to victory!
Looking to teach others and guide them towards glorious battles?
Have your own guide published.